Every so often, you have to install Windows 7 on some PC – for various kind of reasons. But the latest PCs don’t come equipped with any CD/DVD drive to install an operating system, except through USB drives.
Nowadays, whether you are installing Windows 7 on a fresh PC for the first time, or upgrading the Windows OS, or you just want to perform a reinstallation of Windows 7 for a clean start. You need a bootable USB drive.
Here we will guide you how to install Windows 7 from the USB Drive. You can easily follow the steps. The instructions are illustrated using the screenshots. Before you go further, check if you meet the Windows 7 installation requirements.
Prerequisites: Windows 7 installation requirements
- Windows 7 ISO file. You can download here.
- Clean USB flash drive with at least 4 GB to 8 GB of free space.
- ISO to USB burner software e.g. Windows USB/DVD tool or Rufus.
- Boot order priorities in BIOS to boot the PC from USB first.
System Requirements.
Windows 7 doesn’t require a PC with high specifications you can install the OS on any normal PC with minimum system requirements as mentioned below.
CPU: 1 GHz processor or more
RAM:1 GB for 32-bit or 2 GB for 64-bit
HDD: At least 40 GB of disk space
Display: 800×600 resolution at least
GPU: DirectX 9 compatible or higher
Install Windows 7 From USB Drive in 3 Steps
Installation of Windows 7 from a bootable USB drive, will take 15 to 30 minutes depending on your system specifications. Follow the below steps.
- Create a bootable USB from the ISO file.
- Change the boot order in BIOS to boot from USB/CD/DVD.
- Use the installation media/USB to Install the Windows OS.
Step 1 – Create Bootable USB/Installation Media From ISO
You need to create a bootable drive from Windows ISO file, for this, you can use Windows USB/DVD Download Tools or Rufus. Download any of these tools and Create Windows 7 bootable USB from ISO file.
In the end you will see screen saying Bootable USB device created successfully. Close this Win 7 USB DVD download tool and use that drive to install Windows 7.
Restart your PC and boot from USB, for this you need to make certain changes in boot order in BIOS.
Step 2 – Change the Boot Order in BIOS to Boot From USB
To run boot from the USB, make following changes in boot order.
- Restart the Computer and Watch for the BIOS Setup Message
- Enter the BIOS Setup Utility
- Locate and Navigate to the Boot Order Options in BIOS
- Change to the boot order by bringing the “Removable Devices [USB CD/DVD]” option on NO.1.
- Save Changes to the BIOS Setup Utility
- Confirm Boot Order Changes and Exit BIOS
Step 3 – Use the bootable USB to Install The Windows OS
After changing the boot sequence (boot order) simply plug bootable USB drive into your computer (which you have just created) and wait for your computer to restart. You will see the Installation windows. You are now ready to set up your windows installation.
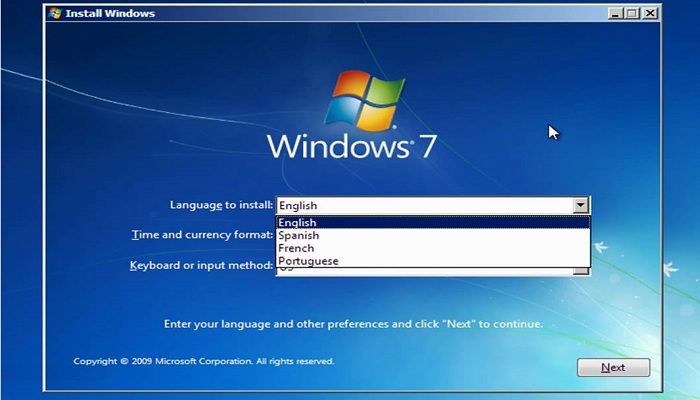
1 – Select the language and press “Next”.
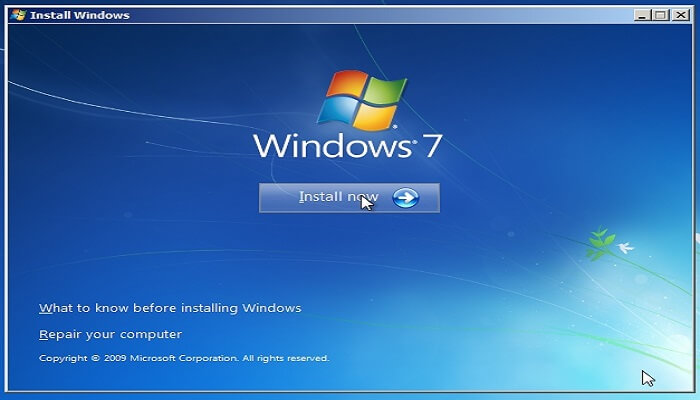
2 – Click on “INSTALL NOW” button.
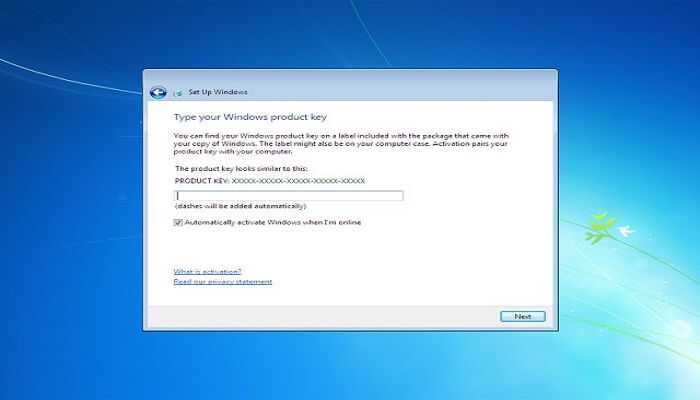
3 – Insert your genuine Windows key Provided by Microsoft.
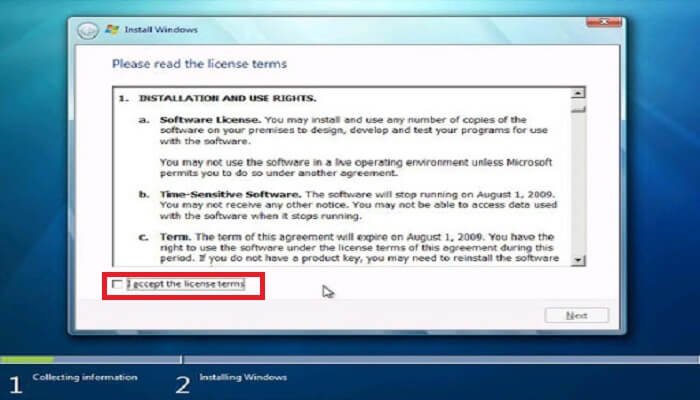
4 – Check the “I accept the license terms” box then click “NEXT”.
5 – Select the “Upgrade: Install Windows and keep files, setting, and application” and click “NEXT”. You can also select “CUSTOM” if you want a clean installation and to create new partitions.
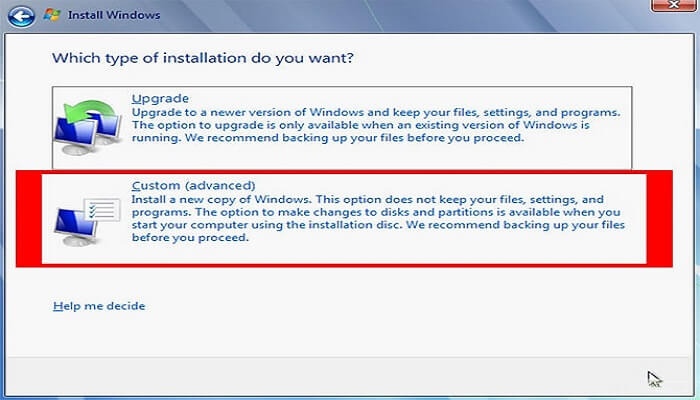
6 – Select the partition where you want to install Windows.
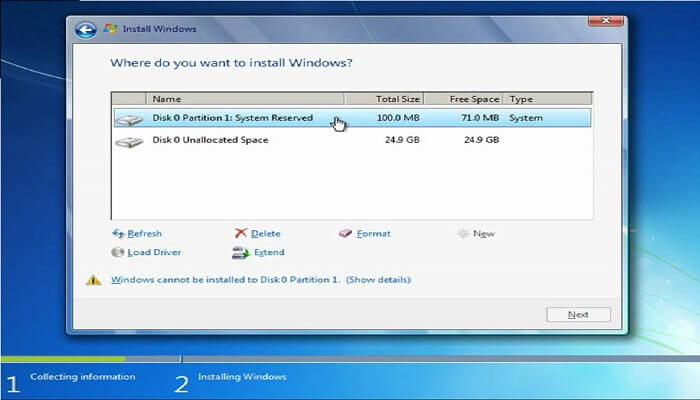
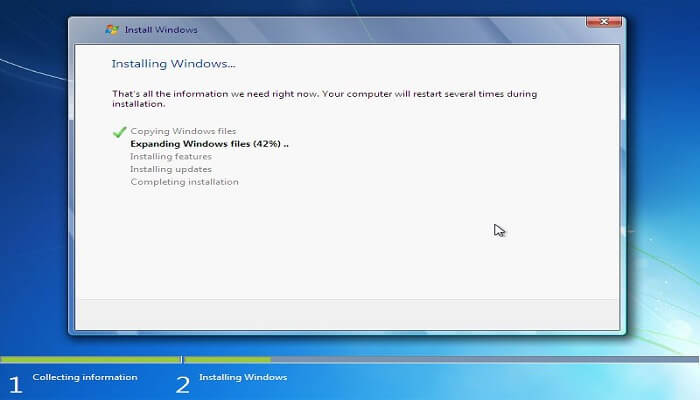
7 – Wait for Windows to Install it will take half an hour to several hours depending on your PC specifications.
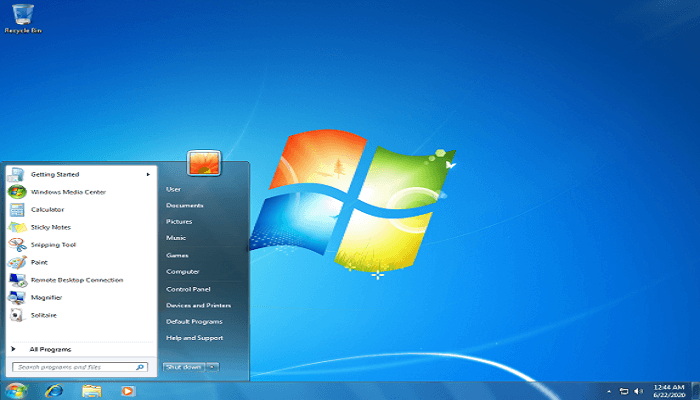
9 – Congratulation! Windows 7 is installed now and your computer is ready to use.
If you like our tutorial to install Windows 7 from USB then do tell us and If you encounter any problem informs us in the comments.


