Windows Defender is a built-in antivirus program provided by Microsoft with Windows 7 & 10 for free, It will protect your PC from malware attack just after installing or upgrading Windows into your PC.
Later on, If you are not satisfied with the performance of Windows Defender or you have a paid version of another antivirus program, you can disable Windows Defender either temporally or Permanently.
Although Microsoft doesn’t provide an option to Disable or Uninstall the Windows Defender in Windows 10, There are many options through which you can disable Windows Defender Permanently on your PC
In this Guide, We will show you the simple steps to disable Windows Defender permanently on your PC.
Disable Windows Defender Permanently Using Windows Security
Sometimes Windows Defender will not allow you to install specific software and apps, Instead of permanently disabling Windows Defender you can Just turn it off for a short time period to install the program correctly.
Follow the steps bellow to turn Microsoft Windows Defender.
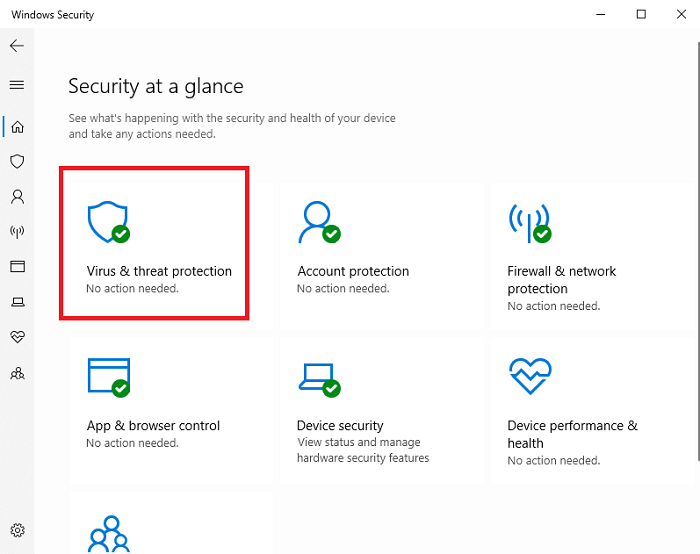
- Open start and search for “Windows Security”.
- Click on “Virus & threat protection” option.
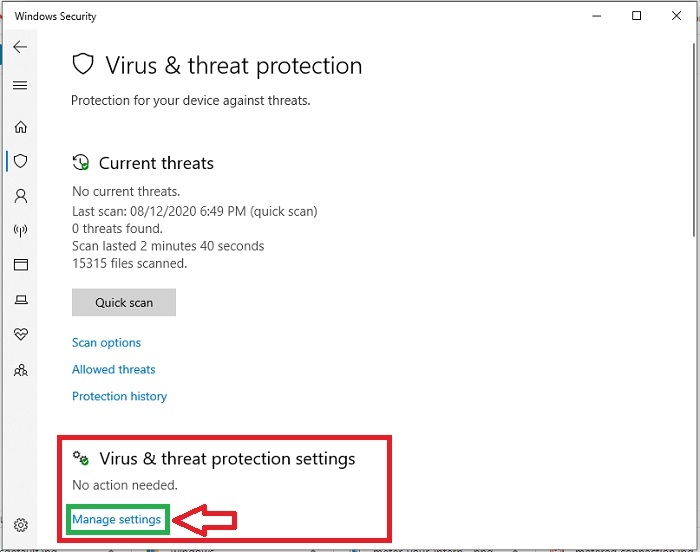
- Scroll Down and choose “Manage Setting” under the “Virus & threat protection settings”.
- Under the heading of “Real-time protection” Turn off to disable Microsoft Defender.
By doing this Microsoft will temporarily disable Windows Defender Antivirus real-time protection, You can now install any specific software or app that Windows Defender won’t allow you to install.
But this is the temporary solution, next time when you restart your PC the Windows Defender will be enabled again automatically.
But this is one of the best options to disable windows defender in Windows 10 to make any system changes or to install a new application that will usually be blocked by the solution.


