If you are looking for a new Windows Installation there’s not cheaper than an ISO image file, Just you need to create a bootable USB from an ISO file. You can easily create a bootable USB using Rufus.
What is a Bootable USB?
A bootable USB/flash drive is a simple USB/Flash Drive having a Windows ISO file with a boot sector. An ISO Windows file is an archive that has all the files of the Windows operating system same as a Windows CD or DVD.
Normally, when you start your PC, it boots from the operating system which is stored in your hard drive. In case you want to repair or install a new operating system, you can change the boot option to USB from BIOS.
Restart your computer and open the BIOS option by pressing F2 or F10 (in most cases) and select the boot option (Boot from USB).
There are many tools to create a bootable USB, but the Rufus is the best and easy to use tool to create a bootable USB. You can Download Rufus from the Rufus official website for free.
Steps to Create a Bootable USB using Rufus.
Requirements:
- A Windows ISO file,
- Rufus latest version (available on https://rufus.ie)
- A USB/Pen Drive having at least 8GB of free space on it.
After getting these things ready follow simple steps to create your own bootable USB.
Step 1: Formate your USB flash drive.
Step 2: Open Rufus tools and Plug USB into your PC.
Step 3: Click on the “DEVICE” option then choose the USB/Flash drive from the drop-down menu.
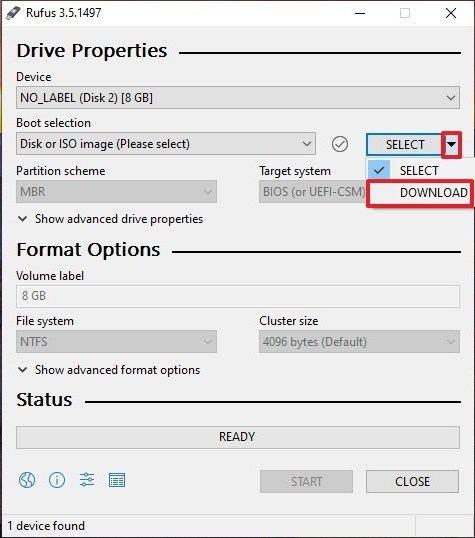
Step 4: Check the Boot Selection option that must be (Disk or ISO image) then click Select. Rufus will open a file explorer and locate the ISO image into your Drives, select it.

Note: Latest version of Rufus (3.12) having the option to download the Windows 8.1 or 10 ISO file through Rufus tools. If you already have a Windows ISO file instead of the “DOWNLOAD” button click on “SELECT“.
Step 5: To create standard Windows installation, Rufus will detect the correct Partition scheme automatically e.g (C: Drive), Keep the default settings if you don’t want to install Windows in any other drive.
Step 6: You can change the “Volume label” a different name but it’s not important, Just leave as it is, also leave the “File System” and “Cluster Size” on default settings.
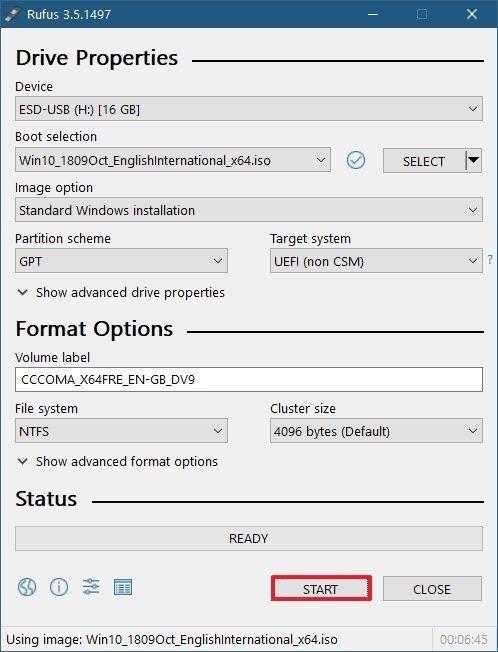
Now click on “START”.
Step 7: It will show a warning “any data on the USB will be destroyed”. It is Normal simply click “OK”.
Rufus will start creating the ISO image on the USB.
Step 8: When Rufus has finished creating the ISO image, close Rufus. Congratulations! your Windows bootable USB is ready.


