Automatic updates is a very controversial feature in Windows 10. The cumulative updates can automatically be installed on your PC without your permission whenever Windows decides to do it. For some users, this can be extremely frustrating, automatic updates force you to shut down your PC when you are not ready to do this.
If you think that the automatic updates might take your system and data resources and you don’t want automatic updates there’s many ways you can turn off automatic updates in Windows 10.
In this guide we will let you know about all solutions to turn of automatic updates in Windows 10.
Cumulative updates is an approach of Windows 10 to ensure that every single user can get the security updates. Although you need to install some Windows updates to improve your PC security and performance.
4 Solutions To Stop Windows 10 Automatic Updates.
- Disable windows update services. (Recommended)
- Turn off automatic updates through Group Policy Editor.
- Meter your network connection to stop automatic updates.
- Change windows updates to manual using registry.
1 – Disable windows update services (Recommended)
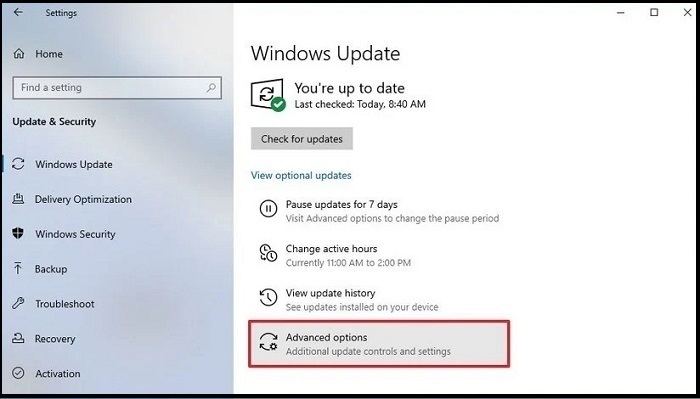
If you don’t want to disable Windows 10 updates permanently you can pause updates for a specific time period by go trough Settings >Updates & Security >Windows update >Advance option > Pause updates.
- Open Setting.
- Click on Update and Security.
- Click on Windows updates.
- Open Advance option. (see picture bellow).
- Under the pause option select the date how long you want to disable the updates.
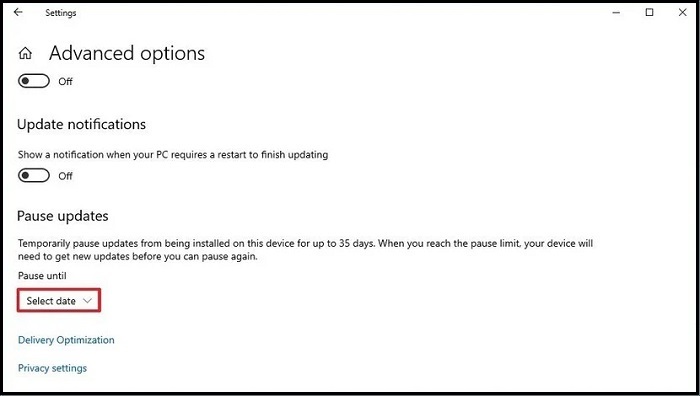
Once you complete your date selection the Windows update will be suspended until the day you specified. But before the pause limit reached install the updates available manulay then change the date again.
2 – Turn off automatic updates through Group Policy Editor
If you are using windows 10 Pro, Education and Enterprise Edition then you can easily turn off automatic updates through group policy editor.
In Windows 10 Group Policy Editor allows you to stop windows update permanently. To disable Windows updates in Windows 10 through the group policy editor follow the steps below.
- Open “RUN” by pressing the “Windows + R” key or simply through Windows search bar.
- Enter “gpedit.msc” command and press enter to open the Group Policy Editor.
- Follow the Navigation Computer Configuration > Administrative Templates > Windows Components > Windows Update.
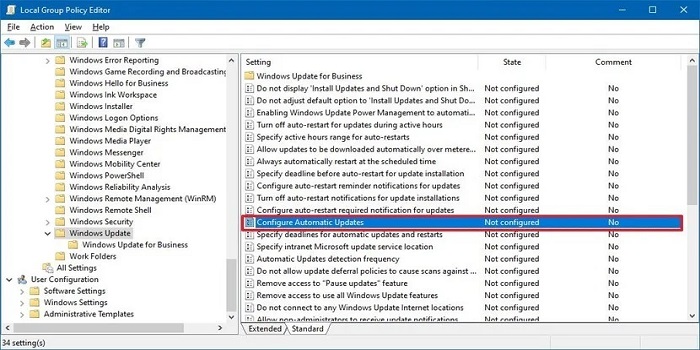
- From the right windows double click on the “Configure Automatic Updates“.
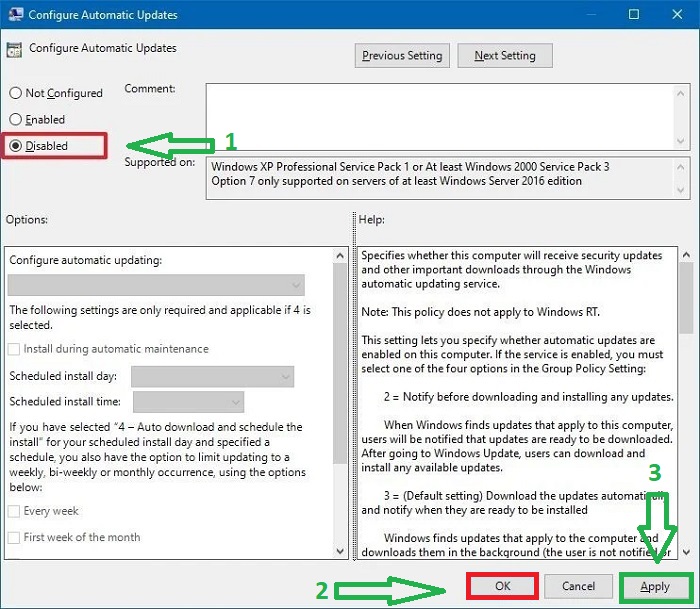
- On the left side of the window choose the “Disable” option to stop automatic updates and then click “Apply” and “OK”.
3 – Meter your network connection to stop automatic updates
Only if you are using a wireless connection on your PC this method will work, a system with Ethernet Connections (wire internet connection) this methods won’t help. Let’s began.
- Click the “Start” and open Settings.
- Choose “Network & Internet” option.
- Click the “Wifi” option, select your wifi connection, and double click to open.
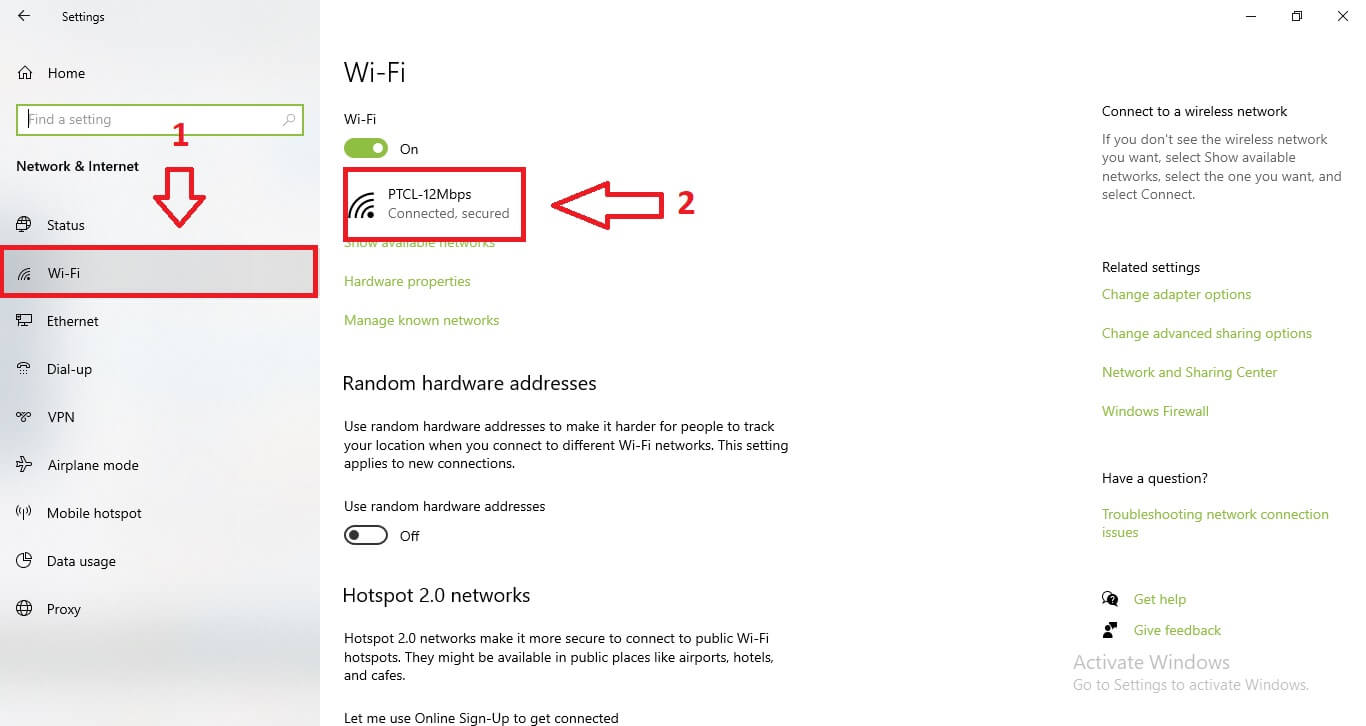
- Bellow the heading of Metered Connection turn on the “set as metered connection” Button.

This will help you to limit your data usage to stop windows automatic updates.
4 – Disable automatic Windows updates using registry
Warning: Editing the registry can be risky, and if you don’t do it correctly it can cause irreversible damage to your windows. Make sure to take a full backup of your PC before proceedings.
- Open “RUN” and enter the command “regedit” and press Enter.
- Navigate the following path.
- HKEY_LOCAL_MACHINE\SOFTWARE\Policies\Microsoft\Windows
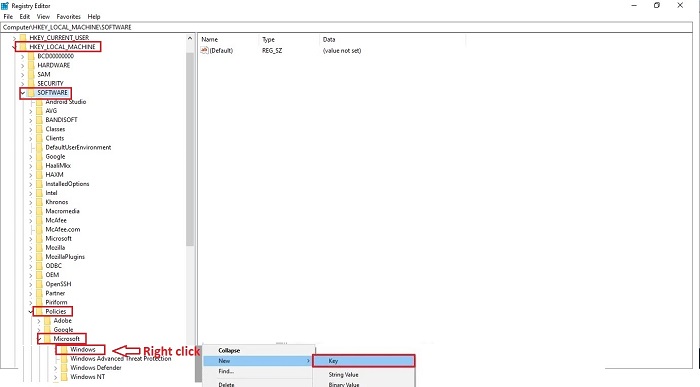
- Right-click on the windows folder option, Click “New” and then click “Key”.
- A new folder will appear under the Windows folder, named this folder “AU” and press Enter.
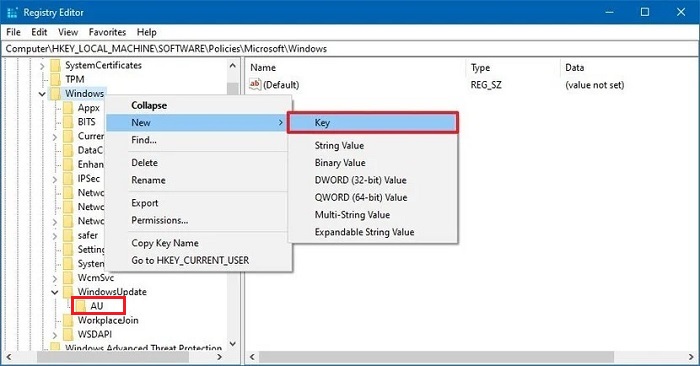
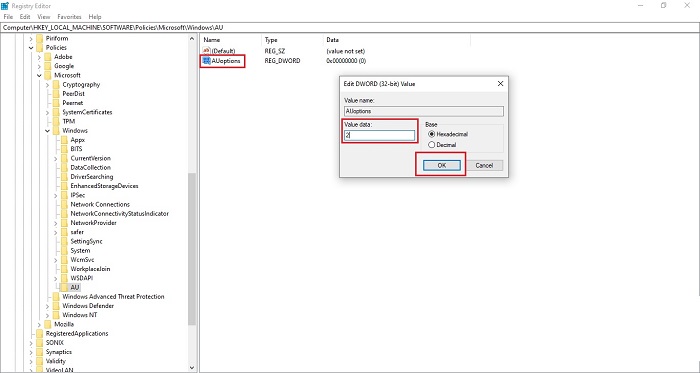
- Open the AU folder which we have just created, Right-click in the right side windows click “NEW” and then click “DWORD (32-bit) Value” and Press Enter.
- Rename the new key “AUOptions” and press Enter.
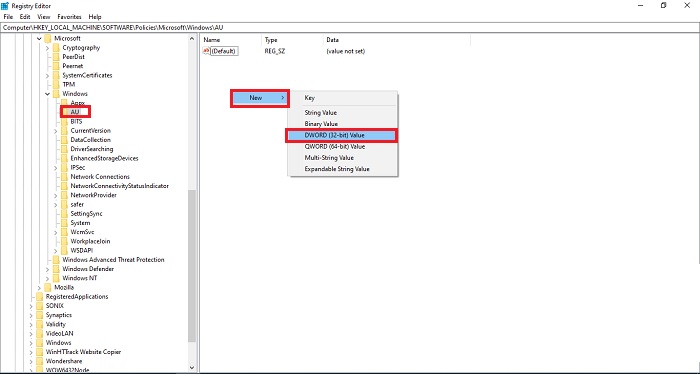
- Double-click the newly created “AUOptions” and change the value 0 to 2. It’s will “Notify you for download and for install updates”. Click “OK”.
- That’s it! Close the Registry to complete the task.
This will stop the windows from automatic updates and will notify you when the new updates are available.
That how you can stop your windows from automatic updates and from using system and data resources without your permeation, Thanks.


